
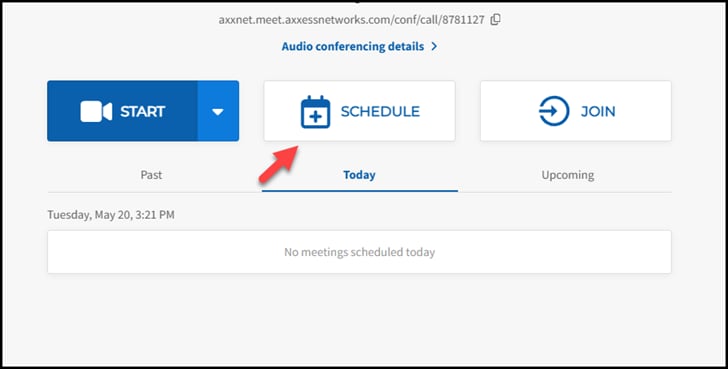
How To Schedule a Meeting
- Click Schedule
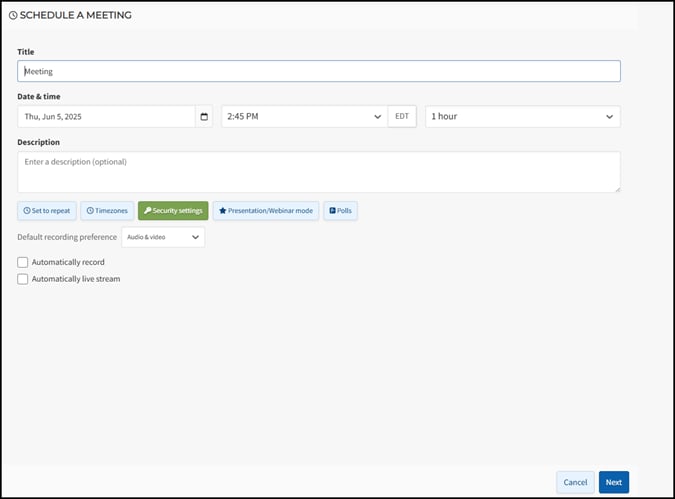
- Enter a Title for your Meeting
- Choose Date, Time and Duration
- Add an Optional Description
- Recording-Set your Recording and/or Transcription Preferences (Premium feature, Check with account admin to see if you are subscribed)
- Set up a Recurring Meeting by clicking on 'Set to repeat' with daily, weekly or monthly options.
- Choose Time zones.
- Security settings-Create a randomly generated one-time access code or add a meeting passcode.
- Choose Meeting Mode
Enter Meeting Information
Conversation/Collaboration Mode
Conversation/Collaboration Mode - All participants join the meeting unmuted and have full access to all sharing tools.
The default mode is where all callers can be heard and can access all sharing features.
- All participants have full access to:
- Activate their webcam, Share their screen Upload/download a document, Present a document
- Use the Whiteboard/Annotation tool
- Use text chat
Q & A Classroom Mode
Q & A Classroom Mode - All participants join the meeting muted but can unmute themselves and have restricted access to all sharing.
This mode is practical for online classes, prayer meetings, company meetings, or training sessions. Any small to midsize groups where interaction is important, but only those you have chosen to present will be able to share any content.
- All participants join the conference muted but can unmute themselves.
- All participants have full access to activate their webcam Raise their hand
- ONLY moderators will be able to:
- Share their screen
- Upload/download/delete a document
- Present and navigate through a document
- Use the whiteboard/Annotation tool
- Use text chat
Presentation/Webinar Mode
Presentation/Webinar Mode - Presenter needs to ensure viewers cannot disrupt or interfere. Easily switch to another mode or unmute individual participants at any point for questions or feedback from viewers.
For any medium-to-large conference with only one or a few presenters in the meeting. In this mode, only moderators will be visible, similar to a webinar.
ONLY moderators will be able to:
- Activate their Webcam
- Share their screen Upload/Download/Delete a document Present and navigate through a document
- View full participant list
- Use the Whiteboard/Annotation tool
- Use Text Chat
Focus Mode
Prevent distraction from other participants and direct all attention to your presentation or training session. Participants will only see the video or screen share of moderators in the meeting, and also, anyone that a moderator has spotlighted.
The host will still see the video of all participants to monitor for visual feedback, but prevent them from distracting each other.
- All participants join the conference muted as default & cannot unmute themselves
- All participants have full access to
- Activate their Webcam
- Raise their hand
- ONLY moderators will be able to:
- Share their screen
- Upload/Download/Delete a document Present and navigate through a document
- Use the Whiteboard/Annotation tool
- Use Text Chat
- Add Participants
Start typing a name or email in the ‘Toʼ field to search through your list of contacts and then hit ‘+ ADDʼ or copy and paste an email address in the 'To' field. Remove participants by clicking on 'Remove' next to the relevant contact.
Make invitees moderators
Make invitees moderators by selecting the star icon next to an invitee's name
Everyone with the STAR beside their name will now have access to all the moderator controls during a meeting.
Note: you can only make inviteeʼs who have a host account within your company a moderator while scheduling. During a live meeting, you can make any participant a moderator via the participant list
- Choose DIAL-IN NUMBERS that will be visible on the invitation Your ‘Primary number/sʼ will automatically be selected.
- Summary
Once you have confirmed the details are correct, hit 'Schedule'.- You and all those added as participants will receive an email invitation with the meeting link and access code for your account, along with all the details they need to join your conference.
- 15 minutes before the scheduled start time all inviteeʼs will also receive an automatic reminder email.
How to Schedule an On- Demand Conference
- No need to schedule anything online – just copy and share your meeting link. letting everyone know the date/time to join.
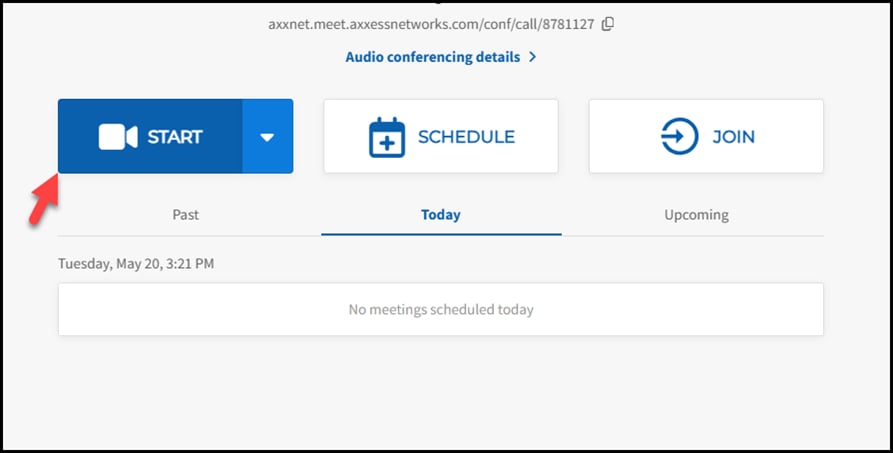
- Host: Login to your account and click ‘STARTʼ.
- Participants: Open the meeting room link in their Chrome Browser OR open their app and enter the access code for the meeting.
How to Join a Meeting from your Dashboard
Click Join
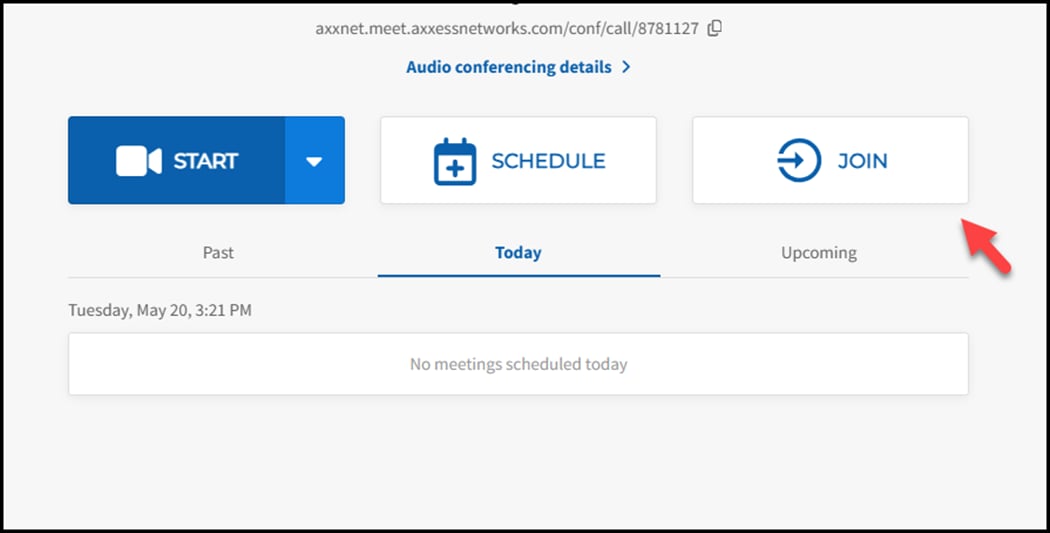
Enter conference access code and select join.

Share your Screen During a Meeting
Select the 'SHARE' button at the bottom of your Online Meeting Room

Choose what you want to share
- Entire Desktop - best for Power Point slide decks or when you have multiple applications that you want to share
- Window - useful if you want to ensure viewers only see one specific document or application
- A Google Chrome tab - easiest for sharing a website in Chrome
Exit Screen Sharing
- Click the 'SHARE' button OR
- Click 'Stop Sharing Screen' in the center or bottom of your online meeting room
Share a Downloadable File
File Sharing allows you to instantly send and receive documents during a conference call.
You can share a file from within your online meeting room by:
- Opening the Chat in your call window on the right side of the page
- Select the paperclip icon in the bottom menu to upload a file from your computer.
Use Whiteboard Tool
How to use the Whiteboard Tool
Brainstorm and collaborate on design ideas, draw diagrams on the fly so people can see what you are thinking and annotate documents. All within your Online Meeting Room in real-time.
Using the Whiteboard
While in the online meeting room, to open the blank whiteboard to share your ideas, just click on the 'WHITEBOARD' icon.

A blank whiteboard will appear with the toolbar on the left. All participants will be able to see the whiteboard and any changes made, as they happen. To close the whiteboard feature, just click on the 'WHITEBOARD' icon once more.

Online Moderator Controls
To change the mute mode while in your personal Online Meeting Room:
- Click the megaphone icon in the top right-hand side of your dashboard OR click on the toolbar on the bottom right-hand side of the screen or open the Participant List
- Select 'Mute All' or 'Unmute All'.
- You will then have the option to allow participants to unmute themselves or prevent them from unmuting.
Polling for Meetings
Scheduling polls
Schedule your meeting in advance and add a poll that can be initiated and/or edited at any time during the live meeting.
- Select 'Schedule' from your account dashboard
- Choose 'Polls' from the options listed under the 'Description' field
- Enter the poll question and multiple-choice options (participants can only select one answer at this time)
- Add additional polls as required and select 'save'
- Continue scheduling your meeting
- During the live meeting, select 'Polls' from the bottom right toolbar, choose a poll and select 'Start poll'
Adding polls during a live meeting
- Ensure you are logged into your account before connecting to your video meeting
- Select 'Polls' from the bottom right toolbar and choose ‘Create poll’
- Enter the poll question and multiple-choice options (participants can only select one answer at this time) and select 'Start poll'
Poll Results
Once a meeting has ended, you will receive a csv file attached to your meeting summary email with all poll results included.
Poll Settings
- Hide results for participants by unchecking 'Show everyone the poll results'
- Gather votes without recording the voter names by checking ‘Allow anonymous voting’
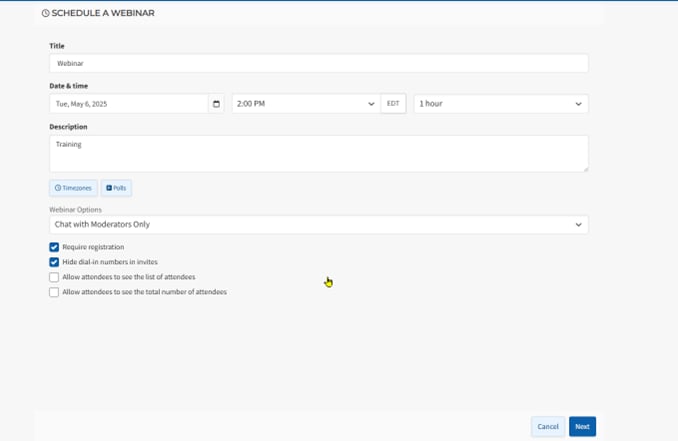
How to Schedule a Webinar
- Click Webinar Icon on the top left of your account dashboard

- Complete the information above.
- Title for your Webinar
- Date and Time
- Description
- Time Zone
- Add optional
- Choose Webinar Options
- Click Next
- Add Panelists and Click Next
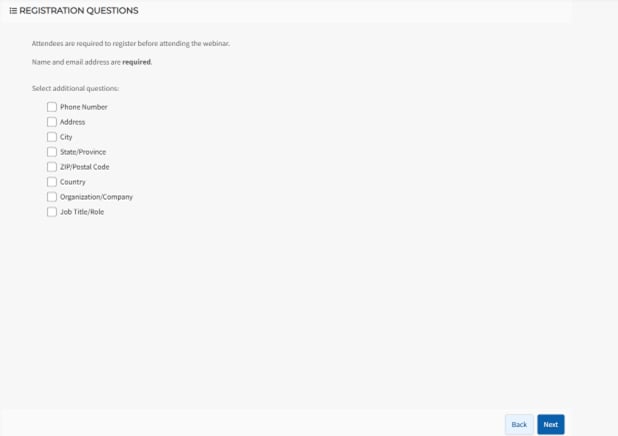
- Choose Registration Questions and Click Next
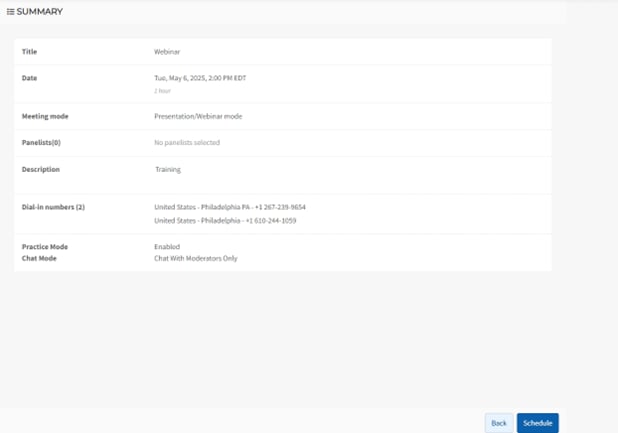
- A summary page will appear.
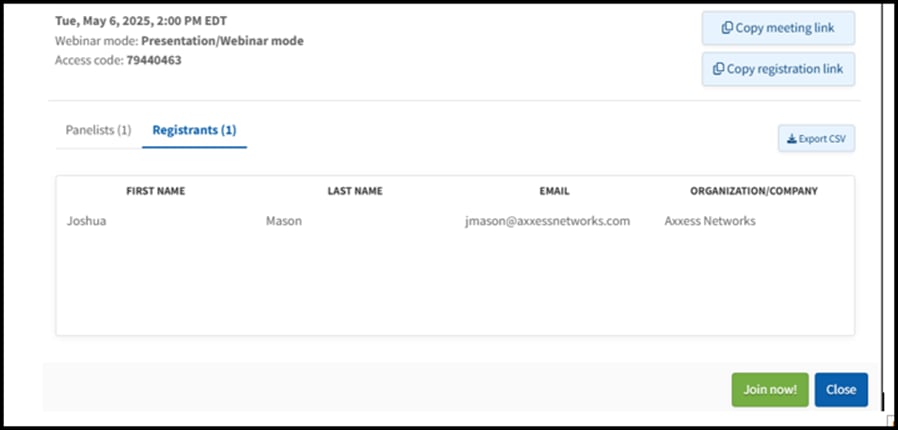
- The confirmation page will allow you to copy meeting links
For Additional Help
Click  on the top right-hand side of your dashboard and select Help
AxxHD Features and Pricing
| Tier | Price | Best For | Key Features |
Basic |
$2.99/user/month |
Great for teams that need dependable video meetings with the essentials. |
Includes:
|
Pro |
$6.99/user/month |
Built for growing teams and client-facing collaboration. |
Everything in Basic, plus:
|
Webinar |
Coming Soon |
A powerful solution for webinars, product demos, live training, and virtual events. |
Pricing and full feature list are currently being finalized and will be announced soon. |